Flying a drone can be a thrilling experience, especially when you have the right tools at your disposal. The DroneDeploy app is a powerful platform designed to help you plan flights, capture aerial imagery, and analyze data with ease. Whether you are a beginner or an experienced drone pilot, this guide will walk you through the steps to use the DroneDeploy app to fly your drone effectively.
Step 1: Download and Install the DroneDeploy App
Before you can start flying, you need to have the DroneDeploy app installed on your mobile device.
- Visit the App Store or Google Play Store: Search for “DroneDeploy” and download the app onto your smartphone or tablet.
- Install the App: Follow the on-screen instructions to install the app on your device.
- Create an Account or Log In: Once installed, open the app and either log in with your existing DroneDeploy account or create a new one.
Step 2: Connect Your Drone
To use DroneDeploy, you need to connect your drone to the app.
- Turn on Your Drone and Remote Controller: Make sure your drone and its remote controller are powered on and ready.
- Connect Your Device to the Remote Controller: Use a USB cable to connect your smartphone or tablet to the remote controller.
- Open DroneDeploy App: Launch the app on your device. The app should automatically detect your drone model.
- Check Firmware and App Updates: Ensure both your drone’s firmware and the DroneDeploy app are up to date. The app will prompt you if there are any updates needed.
Step 3: Plan Your Flight Mission
Planning your flight mission is crucial for capturing the desired aerial imagery.
- Create a New Mission: Tap the “New Mission” button on the home screen to start planning your flight.
- Select Mission Type: DroneDeploy offers various mission types such as Mapping, Inspection, and Progress Tracking. Choose the one that suits your needs.
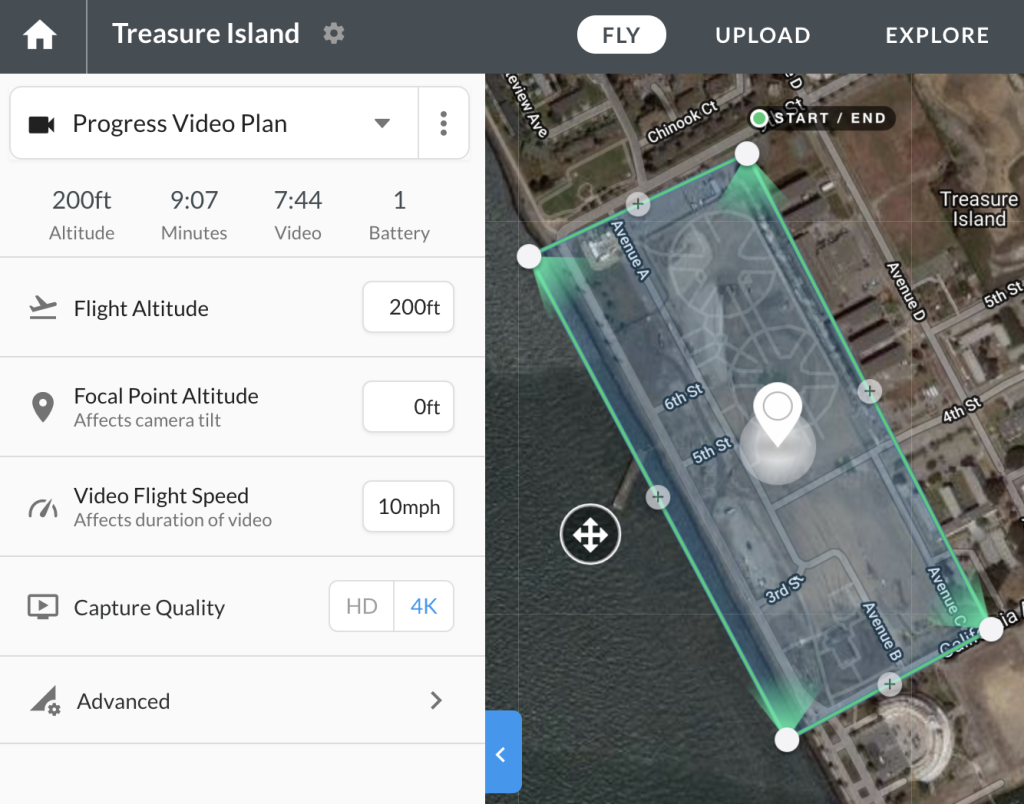
- Define Your Flight Area: Use the interactive map to draw your flight area. You can zoom in and out or move the map to precisely set the area you want to cover.
- Set Flight Parameters: Adjust parameters like altitude, overlap, and speed according to your requirements. DroneDeploy provides default settings, but you can customize them based on your specific needs.
Step 4: Pre-Flight Checklist
Before taking off, go through a pre-flight checklist to ensure everything is in order.
- Check the Weather Conditions: Ensure the weather is suitable for flying. Avoid flying in rain, high winds, or low visibility conditions.
- Verify Drone and Battery Status: Make sure your drone and remote controller have sufficient battery life for the mission. Check for any warnings or errors in the app.
- Calibrate the Drone’s Compass and IMU: If prompted, calibrate the drone’s compass and IMU (Inertial Measurement Unit) for accurate flight.
- Ensure GPS Signal: Make sure your drone has a strong GPS signal before taking off.
Step 5: Start the Flight
With your mission planned and checklist complete, it’s time to start flying.
- Tap “Fly”: Press the “Fly” button in the DroneDeploy app to initiate the flight.
- Monitor the Drone’s Flight Path: The app will display the drone’s real-time flight path and status. Keep an eye on the live video feed and telemetry data to ensure everything is running smoothly.
- Automatic Flight Mode: DroneDeploy handles the flight autonomously based on your pre-set mission parameters. However, you can take manual control at any time if needed.
- Capture Images and Data: As the drone flies, it will automatically capture images or videos according to the mission type.
Step 6: Return to Home and Land
Once your mission is complete, it’s time to bring your drone back.
- Automatic Return to Home (RTH): DroneDeploy will automatically return the drone to its takeoff point once the mission is complete or if the battery reaches a critical level.
- Manual Landing (if needed): If you prefer, you can manually land the drone by switching to manual control and guiding it safely to the ground.
- Turn Off the Drone and Remote Controller: Once landed, power down your drone and remote controller.
Step 7: Review and Analyze Data
After a successful flight, it’s time to review and analyze the data you’ve collected.
- Download the Data: Transfer the images and data from your drone’s SD card to your computer or directly to the DroneDeploy app, depending on your workflow.
- Process the Data in DroneDeploy: Use DroneDeploy’s cloud-based platform to process the data. You can create 2D maps, 3D models, and more.
- Analyze the Results: Utilize the app’s built-in analysis tools to measure distances, areas, and volumes, and generate detailed reports.
Step 8: Save and Share Your Work
Once your data is processed and analyzed, you can save and share your results.
- Save Your Project: Ensure all your data and analysis are saved in the DroneDeploy app or exported to your preferred file format.
- Share with Others: Share your maps, models, and reports with team members or clients via email or direct links.
Conclusion
Using the DroneDeploy app to fly your drone is a straightforward process combining ease of use and powerful capabilities. By following these steps, you can effectively plan, execute, and analyze drone flights, whether for personal projects or professional applications. Remember always to fly safely and adhere to local regulations when operating your drone.